Programming #
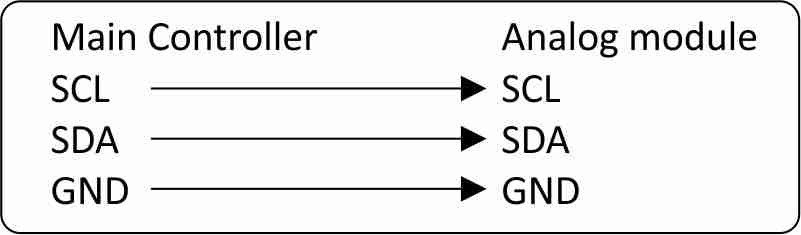
NORVI-EX-ANI uses ADS1115 over I2C communication. On devices with address configuration support. The I2C addresses of the devices can be configured with the DIP switches at the bottom of the controller. It can Daisy chain up to eight expansion modules.
Expansion Port #
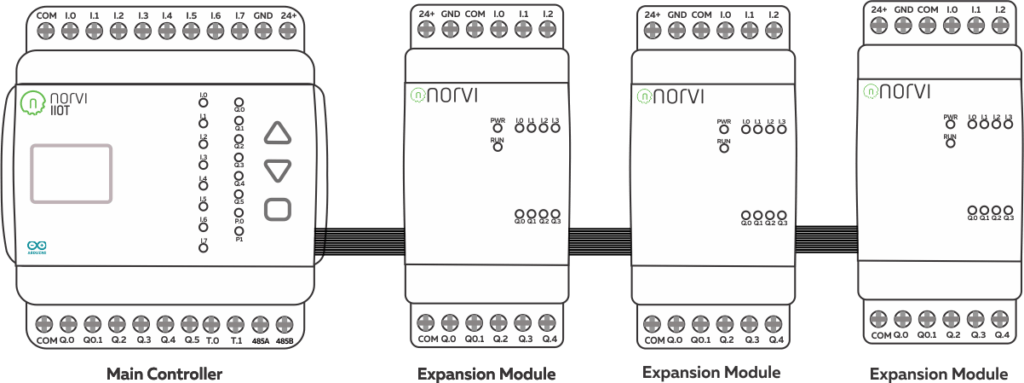
The expansion port of the NORVI IIOT Controllers can be utilized for external sensor connections where raw GPIO connections are required, or they can be used to plug NORVI Expansion Modules. Browse the NORVI Expansion Product Range. How to Connect NORVI Expansion Modules
I2C Address Setting #
The I2C address of the expansion module can be configured by switching DIP switches at the bottom of the expansion module. The device can be configured at 8 I2C addresses using the first 3 DIP switches.

4-20 mV Analog inputs #
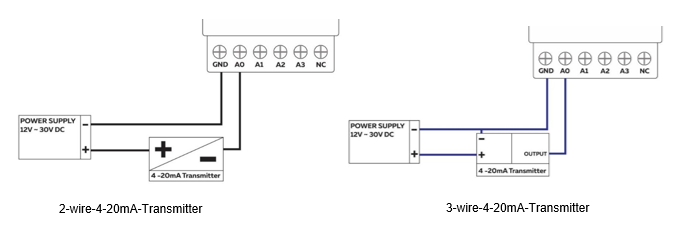
Wiring 4-20mV Analog Inputs #
The analog input of the NORVI Analog Expansion input should be connected with reference to the ground input of the controller. Reading the relevant channel of ADS1115 gives the value of the analog input. The resolution of the reading can be scaled with the PGA of the ADS1115.
Refer to the I2C Address setting to set the I2C address of the Expansion

Programming Analog Inputs #
The below example code reads the analog inputs on the NORVI Analog input expansion and prints them on the serial monitor.
#include <SPI.h>
#include <Wire.h>
#include <Adafruit_ADS1X15.h>

#define I2C_SCL 17
#define I2C_SDA 16

Adafruit_ADS1115 ads;

void setup() {
  // put your setup code here, to run once:
  Serial.begin(115200);
  Serial.println("Testing Analog Input Expansion Module");

  Wire.begin(16,17);

  if (!ads.begin(0x48)) {
    Serial.println("Failed to initialize ADS.");
    while (1);
  }

}

void loop() {
  // put your main code here, to run repeatedly:
  int16_t adc0, adc1, adc2, adc3;

  adc0 = ads.readADC_SingleEnded(0);
  adc1 = ads.readADC_SingleEnded(1);
  adc2 = ads.readADC_SingleEnded(2);
  adc3 = ads.readADC_SingleEnded(3);
  Serial.println("");

  Serial.print("AIN0: "); Serial.print(adc0); Serial.println("  ");
  Serial.print("AIN1: "); Serial.print(adc1); Serial.println("  ");
  Serial.print("AIN2: "); Serial.print(adc2); Serial.println("  ");
  Serial.print("AIN3: "); Serial.print(adc3); Serial.println("  ");

  Serial.println("");

}


